

Spring Cloud Task: Async Processing with Spring Cloud (3/3)


Part 3: Triggering Task on receiving Events via RabbitMQ
Hello World! This is the final part of the three-part series on asynchronous processing in Spring Cloud. In the first part , I talked about Spring Boot and Spring Cloud, asynchronous processing and serverless computing. Then in the second part , we wrote our first Spring Cloud Task, and saw it run. And finally, interfaced the Task with MySQL for persisting the Task outbound state.
What are we building in this part?
The Task we developed in the previous post is taking three command line arguments – StationID, License Plate and timestamp – and printing them out to the console. Along with that, the MySQL setup allows these values to be logged inside the database schema. However, we still need to run this Task manually. There are a few ways we can automate the execution of this Task.
- We can schedule the Task as a cronjob which will ensure that the job runs at the specified period and on the recurring conditions specified with the cronjob.
- We can trigger the Task to execute in response to some event that is generated within the system that this Task is a part of.
In this post, we’re trying to achieve the event-based execution of the Task. The sequence diagram below explains our process flow:
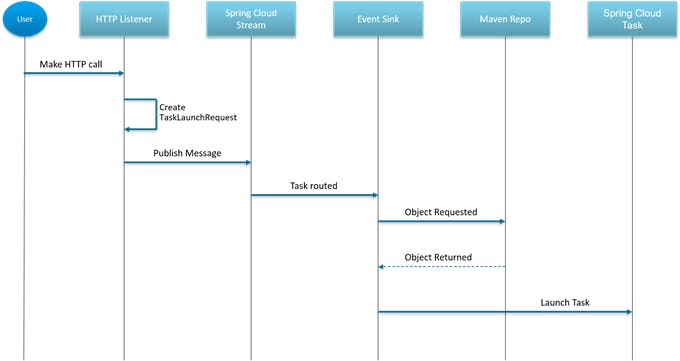
- A user or a subsystem (microservice) makes an HTTP call to a controller endpoint i.e., the HTTP Listener.
- The
HTTPListenergenerates aTaskLaunchRequestand publishes this request to Spring Cloud Stream (explanation follows). - The Spring Cloud Stream is configured to a RabbitMQ server which is our event sink i.e., destination of
TaskLaunchRequestevents from theHTTPListener. - The Event Sink requests the Maven repository for the artifact that is mentioned in the
TaskLaunchRequest. - If the Maven Repo finds the required artifact, it returns it to the Event Sink and the Event Sink is then responsible for launching the Task asynchronously (Sink doesn’t wait for a response from the Task).
- The Task completes its business logic, persists its execution history and any other outbound state it is configured to and exits.
What is Spring Cloud Stream
In simple terms according to the Spring Cloud documentation,
Spring Cloud Stream provides a framework for building event-driven Spring Boot microservices for real-time stream processing.
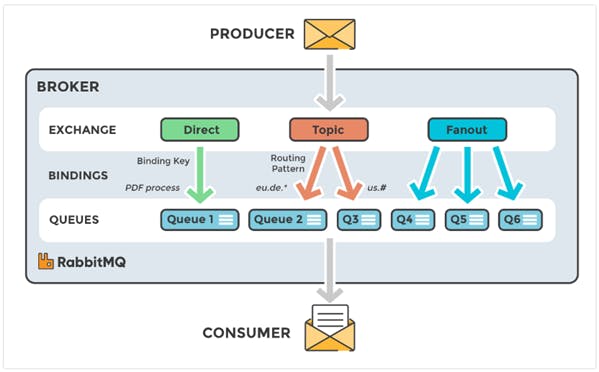
What this means is that Spring Cloud Stream provides for a flexible programming model using the well-known Spring concepts to allow Spring developers easy access to shared messaging systems from within their microservices. As seen in the image below, these shared messaging systems provide message brokers. These brokers do all the heavy lifting to enable communication between microservices. Message brokers are responsible for translating messages between formal messaging protocols, allowing services to “talk” to each other irrespective of the language used to develop them and the platform they are running on.
There are a lot of shared messaging systems supported by Spring Cloud Stream. Some of the prominent ones include – RabbitMQ, Apache Kafka, Amazon Kinesis, Google PubSub, Azure EventHubs etc. We will be using RabbitMQ for this part but I encourage you to have a look at the other services as well. In particular, when talking about on-premise messaging systems, RabbitMQ and Apache Kafka might be the ones that you’ve heard of most frequently. At this point of time, I am not qualified enough to give you insights on which system to use but I found this article to be very useful in helping me understand how the both of them were different and which use cases each of them best-fit.
What is RabbitMQ?
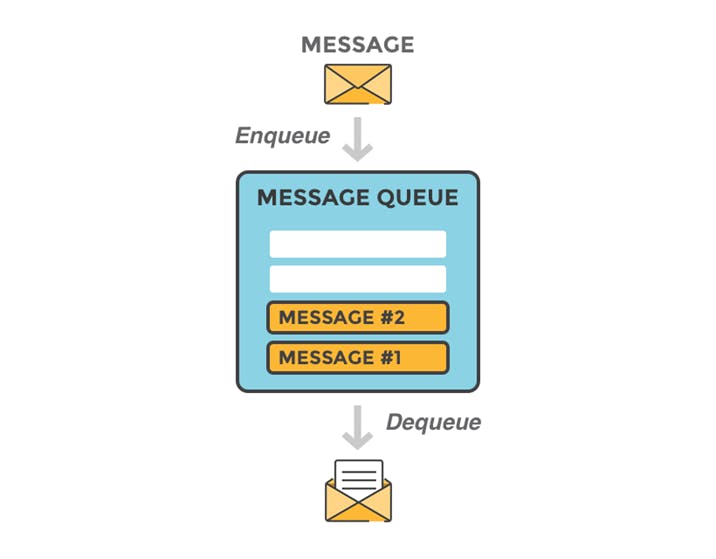
So RabbitMQ is nothing but a message broker. As a message broker, it defines several queues to which applications connect to transfer information. This message can be anything – a request for starting a process or task, or a simple text message. It is the duty of the queue defined in the broker to store this message until a consumer connects to the broker and reads this message off the queue.
Diving deeper into RabbitMQ will help you understand its architecture better and the approach it uses to relay messages between services. In case you want to dig deeper, RabbitMQ is a very mature technology so you can search and read a bit more before following along with the implementation.
Getting RabbitMQ
We will call upon our trusted friend Docker to provide us with the RabbitMQ server. RabbitMQ has an official Docker image hosted on the Docker Hub image registry. We want to run this RabbitMQ environment with the management plugin enabled. To run this image, use the below command:
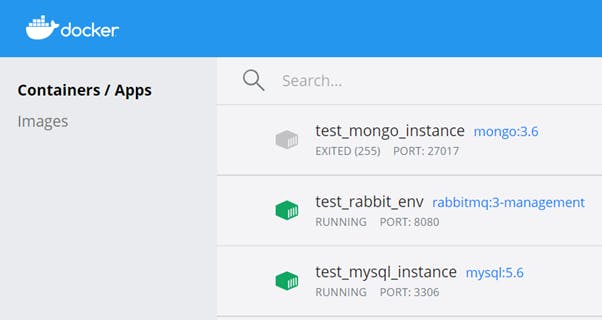
docker run -d --hostname my-rabbit --name test-rabbit-env -p 8080:15672 -p 5672:5672 rabbitmq:3-management
Docker will pull and run the image inside a container, and you should see the following containers now on your Docker Desktop:
To verify that the Management console is working properly, visit http://localhost:8080 on your browser and you should see a login page for the management console:
The docker run command that we executed above will spin up a default user for us to login to the management console. Use “guest” as the username and the password and click on login (Note: “guest” is case-sensitive). This is what the Management console looks like:
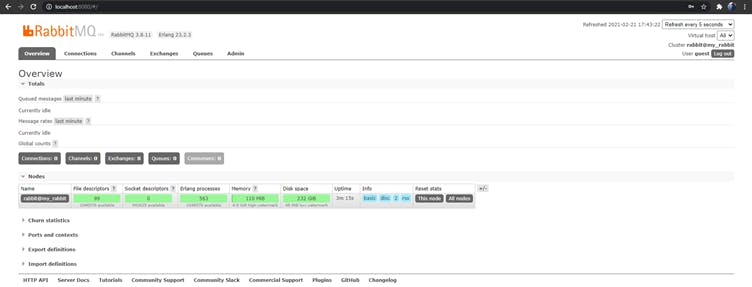
Note: You will not see stuff under the “Nodes” section if this is the first time, you’re using this RabbitMQ container.
Publishing the Task to local Maven Repo
When a TaskLaunchRequest is generated, the Event Sink must look for the requested Task somewhere. In Spring Boot, we usually use Maven for dependency management and as a build system. Maven has a repository to store all artifacts i.e., packaged .jar or .war files of the built Spring Boot apps.
In this section, we build our app and publish it to our local Maven repo. To do so, follow the below steps:
- Delete the
/src/test/javapackage from the Package Explorer view on the left side in your STS window. - In the same project, you should also see a
src/testfolder. Delete that as well to remove the test artifacts. - Right click on the project > Run as > Maven Clean and wait for it to complete.
- Right click on the project > Run as > Maven Install and wait for the build to be completed.
- If you see a BUILD SUCCESSFUL message, it means that this task has been accomplished and the built artifact for this Cloud Task is published to the local Maven repo on your host.
Creating the Event Sink
We need an Event Sink to absorb all the TaskLaunchRequest messages from the HTTPListener. To create the Event Sink:
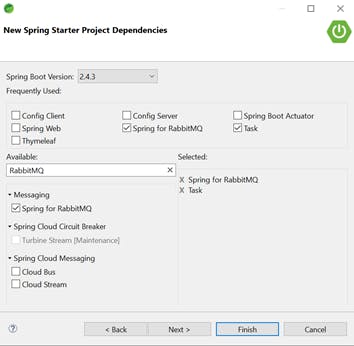
- Click on File > New > Spring Starter Project and enter the required details. Click on Next.
Search for and add the following dependencies – Spring Cloud Task, Spring for RabbitMQ.
Verify that the pom.xml file has the following dependencies:
<dependency> <groupId>org.springframework.boot</groupId> <artifactId>spring-boot-starter-amqp</artifactId> </dependency> <dependency> <groupId>org.springframework.cloud</groupId> <artifactId>spring-cloud-starter-task</artifactId> </dependency> <dependency> <groupId>org.springframework.boot</groupId> <artifactId>spring-boot-starter-test</artifactId> <scope>test</scope> <exclusions> <exclusion> <groupId>org.junit.vintage</groupId> <artifactId>junit-vintage-engine</artifactId> </exclusion> </exclusions> </dependency> <dependency> <groupId>org.springframework.cloud</groupId> <artifactId>spring-cloud-starter-stream rabbit</artifactId> </dependency>- Add a new dependency for a local deployer. Spring Cloud Local Deployer is an implementation of the Spring Cloud Deployer SPI for use to deploy applications on the same machine. This occurs by this application spawning a new JVM process for the deployed application.
<!-- Deployer used for local testing --> <dependency> <groupId>org.springframework.cloud</groupId> <artifactId>spring-cloud-deployer-local</artifactId> <version>1.0.3.RELEASE</version> </dependency> - Make sure that your
spring-cloud.versionproperty is set in the tag:<properties> <java.version>1.8</java.version> <spring-cloud.version>Hoxton.SR9</spring-cloud.version> </properties> - And add the following
<dependencyManagement>tag:<dependencyManagement> <dependencies> <dependency> <groupId>org.springframework.cloud</groupId> <artifactId>spring-cloud-dependencies</artifactId> <version>${spring-cloud.version}</version> <type>pom</type> <scope>import</scope> </dependency> </dependencies> </dependencyManagement> - Annotate the Sink’s main class with the
@EnableTaskLauncherannotationimport org.springframework.boot.SpringApplication; import org.springframework.boot.autoconfigure.SpringBootApplication; import org.springframework.cloud.task.launcher.annotation.EnableTaskLauncher; @SpringBootApplication @EnableTaskLauncher public class TaskSinkApplication { public static void main(String[] args) { SpringApplication.run(TaskSinkApplication.class, args); } } - The Event Sink also must publish the message from the
HTTPListenerto the message queue. For this, we need to give config properties to theTaskSinkon where to find our RabbitMQ server. In theapplication.properties:spring.rabbitmq.broker-url=tcp://127.0.0.1:5672 spring.rabbitmq.username=guest spring.rabbitmq.password=guest spring.cloud.stream.bindings.input.destination=tasktopic logging.level.org.springframework.cloud.task=DEBUG logging.level.org.springframework.cloud.stream=DEBUG - Pay attention to the spring.cloud.stream.bindings.input.destination property. This property defines the name of the topic that this application is binding itself to. So when the Sink publishes a message, it is enqueued into the queue that is identified as “tasktopic”. All consumers of our application will also bind to this same queue using the unique “tasktopic” name.
Creating the Task Launcher
We said that we need an HTTPListener that will trigger this whole process. So we need to create this Listener. Basically, we need an API endpoint to which we can send a POST request to, for testing, and microservices or actual users can send a POST request to, in production. We create this TaskLauncher as follows:
- File > New > Spring Starter Project and provide the required information.
- Add the following dependencies after clicking “Next” – Spring Cloud Task, Spring for RabbitMQ and Spring Web.
- We will first set the config properties to connect to the RabbitMQ server. In the
application.properties:server.port=8082 spring.rabbitmq.broker-url=tcp://127.0.0.1:5672 spring.rabbitmq.username=guest spring.rabbitmq.password=guest spring.cloud.stream.bindings.output.destination=tasktopic - The next job at hand is to create a class that will process the API call. This processor will create a
TaskLaunchRequestand publish it to the message queue. In the base package itself, create a new classTaskProcessor.java:
import java.util.ArrayList;
import java.util.Arrays;
import java.util.List;

import org.springframework.beans.factory.annotation.Autowired;
import org.springframework.cloud.stream.annotation.EnableBinding;
import org.springframework.cloud.stream.messaging.Source;
import org.springframework.cloud.task.launcher.TaskLaunchRequest;
import org.springframework.messaging.support.GenericMessage;
import org.springframework.stereotype.Component;

@Component
@EnableBinding(Source.class)
public class TaskProcessor {

    @Autowired
    private Source source;

    /**
     * Method that is going to publish a request
     * to the source i.e. the RabbitMQ queue.
     *
     * @param payload
     */
    public void publishRequest(String payload) {
        // where to find the task
        String url = "maven://<enter-group-id-from-task-pom>:<enter-artifact-id-from-task-pom>:jar:0.0.1-SNAPSHOT";
        List<String> input = new ArrayList<>(Arrays.asList(payload.split(",")));
        // create a new task launch request with the url of the task and it's command line args
        TaskLaunchRequest request = new TaskLaunchRequest(url, input, null, null, null);
        System.out.println("Created Task request!");
        // generate a new message about this task launch request and send it over to the bus
        GenericMessage<TaskLaunchRequest> message = new GenericMessage<>(request);
        this.source.output().send(message);
    }

}
- Now we need to create the Controller that will define the POST API endpoint. Create a new class under the base package,
TaskController, as follows:
import org.springframework.beans.factory.annotation.Autowired;
import org.springframework.web.bind.annotation.RequestBody;
import org.springframework.web.bind.annotation.RequestMapping;
import org.springframework.web.bind.annotation.RequestMethod;
import org.springframework.web.bind.annotation.ResponseBody;
import org.springframework.web.bind.annotation.RestController;

@RestController
public class TaskController {

    /**
     * Inject the TaskProcessor bean for
     * use from the application context.
     */
    @Autowired
    private TaskProcessor t;

    /**
     * POST endpoint to create a TaskLaunchRequest
     * and publish the message to the RabbitMQ
     * broker.
     *
     * @param s
     * @return
     */
    @RequestMapping(path="/tasks", method=RequestMethod.POST)
    public @ResponseBody String launchTask(@RequestBody String s) {
        t.publishRequest(s);
        System.out.println("Request Made!");
        return "Success";
    }

}
Running the Project
Run the
TaskSinkapplication first. When executed, you should see a new topic titled “tasktopic” on the RabbitMQ management console under the “Exchanges” tab:
Now run the
TaskLauncherapplication and wait for it to start on the 8082 port.We can now send a POST request to the “/tasks” endpoint and specify the three command line arguments as a comma-separated string in the post body – StationID, License Plate and the timestamp. I use Postman to test the API but you can any other API testing tool as well. If you’re a purist, you can even make a cURL request!

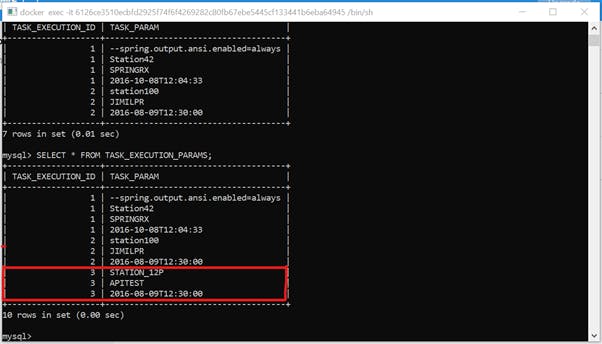
Verify that the new parameters were persisted to the MySQL database. Exec into the Docker MySQL container and log into mysql:
mysql> use tasklogs;
mysql> SELECT * FROM TASK_EXECUTION_PARAMS;
You should see the latest arguments that you added to the POST request body:
Thank you so much for reading through all the three parts :)